
26 August 2026 · TJ Smile Studio
Carbide then Polish: Remove Invisalign Attachments Without Enamel Damage
A cosmetic dentist explains the carbide then polish technique to remove Invisalign attachments safely, protect enamel, polish, and fit same day retainers.
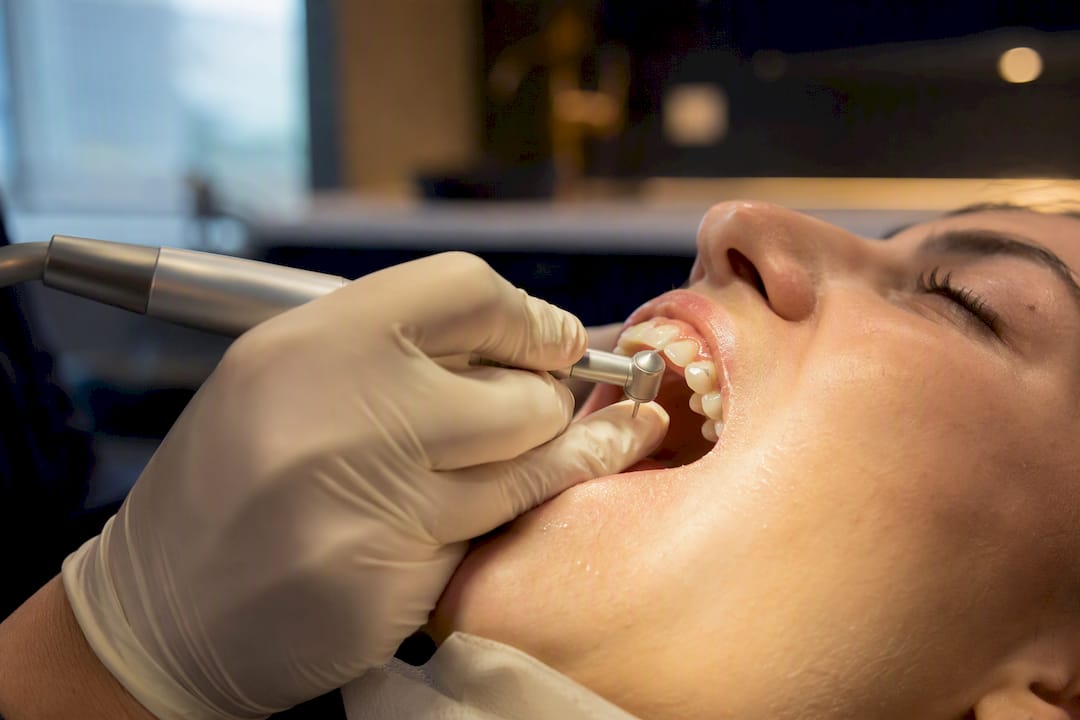
A dentist or orthodontist should remove your Invisalign attachments, never try this yourself. The appointment is short, generally painless, and finishes with polishing and a plan for your retainers. Removing them at home risks scratching or fracturing enamel, and can undo months of careful tooth movement, so leave it to a qualified clinician.
TL;DR:
- Only a registered dentist or orthodontist should remove Invisalign attachments, as improper removal risks enamel damage and residual composite buildup.
- The removal process involves a carbide bur to bulk away attachments followed by polishing under magnification, which minimizes residual composite to about 20-40%.
- Most patients experience brief, painless sensations with short-term sensitivity that typically resolves within a couple of days, but persistent pain warrants a dental check.
- After removal, polishing is essential to prevent plaque traps, and retainers should be fitted immediately to reduce the risk of teeth shifting within days.
- Booking an appointment that includes both removal and retainer fitting, ideally with digital scans and magnification, ensures optimal enamel preservation and treatment outcome.
Table of Contents
- What are Invisalign attachments and why do they stay on until the end?
- Who should remove attachments, and what should you check first?
- What happens step by step during removal
- Does it hurt, and what sensitivity is normal?
- Aftercare: polishing, retainers, and keeping your result
- How long it takes, what it costs, and how to book
- Why trust this guide
- What most patients get wrong about the final appointment
- Ready to book your attachment removal appointment?
- Sources
What are Invisalign attachments and why do they stay on until the end?
Attachments are small, tooth-coloured bumps of composite resin bonded directly onto specific teeth. They are not decorative. Each one gives your aligner a precise point to grip, allowing it to apply rotational or tipping forces that plastic alone cannot generate.
That is why your dentist will not remove them early, even if you are impatient to see your natural teeth again. Taking them off before treatment finishes can undermine the exact movements they were placed to control.
A few things worth understanding about them:
- They are shade-matched to blend with your enamel, so most people forget they are there
- Each attachment is mapped to a specific stage in your ClinCheck treatment plan
- Removing one prematurely can shift the fit of aligners still in the sequence
- They are bonded with the same adhesive principles used in composite bonding, which is why removal needs the same care as any composite work
Who should remove attachments, and what should you check first?
Only a dentist or orthodontist should remove Invisalign attachments. This is not a job for a nail file, a pair of tweezers, or patience alone. The composite is bonded to enamel, and enamel does not regenerate once it is damaged.
Before you book, it is worth checking that whoever is treating you is registered with the General Dental Council (GDC), which is the legal requirement for practising dentists in the UK. You can search any practitioner’s name or number on the GDC’s public register in seconds.
Operator skill genuinely matters here. Clinicians who work under magnification loupes of 2.5x or greater consistently leave less residual composite behind, according to a systematic review of clear aligner attachment removal. Before your appointment, it is reasonable to ask:
- Who will physically remove the attachments, and what is their experience with Invisalign specifically
- Whether the clinic uses magnification during removal
- What instruments they use, and whether polishing is included in the same visit
Pro Tip: Ask to see your Invisalign attachment map before removal day. Knowing exactly how many attachments you have, and where, helps you gauge how long the appointment should take.
What happens step by step during removal
The process follows a fairly consistent sequence, whether you have four attachments or fourteen.
- Check and consent. Your dentist confirms your treatment is genuinely complete, checks for any sensitivity issues, and talks you through what is about to happen.
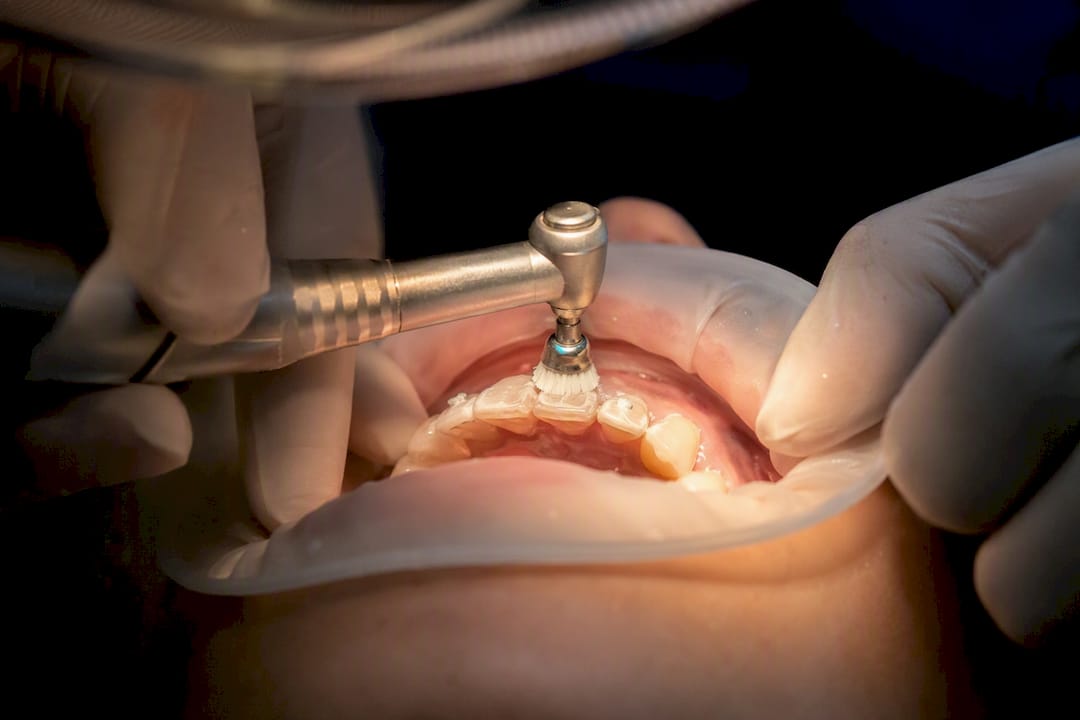
- Bulk removal. A tungsten carbide bur, running under water spray to keep things cool, shaves away the bulk of each composite attachment. The water spray also stops enamel overheating and keeps debris clear.
- Progressive smoothing. Silicone polishers, or a one-step polishing system, work over each site to remove what the bur left behind and smooth the enamel surface.
- Final inspection. Your dentist checks every tooth under magnification for stray composite, applies fluoride or a desensitising agent if you need it, and takes a scan or impression for your retainers.
That carbide-then-silicone sequence, done under magnification, is the combination the clinical evidence favours for stripping composite efficiently while protecting the enamel underneath.
Timing varies with how many attachments you have. A handful of teeth might take a few minutes each; a full set across both arches typically stretches the appointment to closer to an hour once polishing and retainer planning are included.
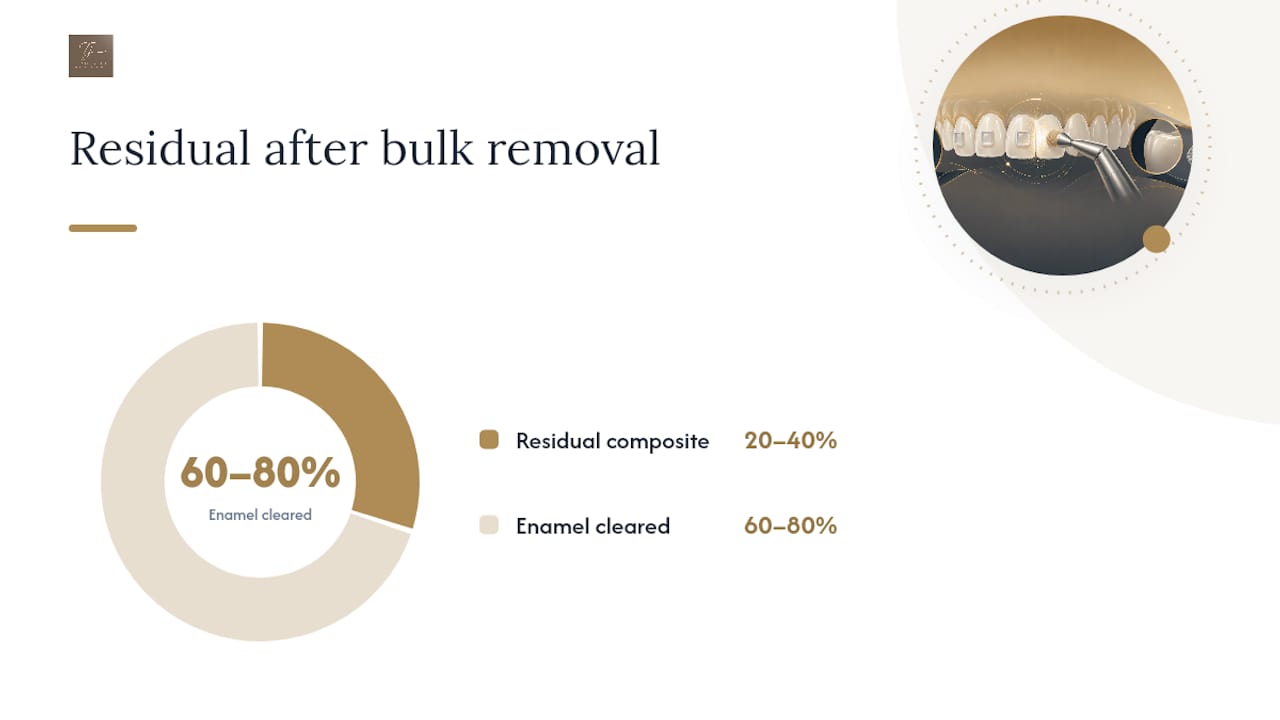
Even under ideal technique, laboratory studies have found residual composite covering roughly 20 to 40% of the treated enamel surface after initial bulk removal. That is exactly why the polishing stage is not optional. It is the step that catches what the bur cannot, and some cases, particularly where attachments were larger or placed on curved surfaces, benefit from a short follow-up polish rather than trying to finish everything in one pass.
Does it hurt, and what sensitivity is normal?
Most patients describe a vibrating or buzzing sensation, similar to a routine polish at a check-up, rather than anything painful. Local anaesthetic is rarely needed, because the bur is working on bonded composite rather than the tooth itself.
Some short-term sensitivity to cold or air afterwards is common, particularly if you had a lot of attachments removed in one sitting. This usually settles within a day or two. Persistent or worsening pain is not typical and is worth calling your clinic about, rather than waiting it out.
Complications are uncommon when the removal follows a proper sequence, but they are not zero. A few points worth knowing:
- Genuine enamel loss from attachment removal is measurable but small in well-controlled studies
- Leftover flecks of composite are more likely with rushed technique or no magnification
- The same evidence that supports the carbide-then-silicone protocol also shows it minimises both risks compared with a single-instrument approach
A Clinical Practice systematic review found that magnification of at least 2.5x was repeatedly linked to more precise removal and less leftover composite across laboratory studies. That single detail, whether your dentist is working with proper magnification, tells you more about likely comfort and outcome than almost anything else about the appointment.
Aftercare: polishing, retainers, and keeping your result
The appointment does not end when the last attachment comes off. Polishing removes any residual composite and smooths the enamel surface, which matters because rough patches are exactly where plaque likes to collect.
Retainers should be part of the same conversation, ideally the same visit. Your teeth can begin drifting within days of finishing active treatment, so most clinics take a digital scan or fitting for retainers immediately after removal. If your clinic offers same-day digital workflows, similar to the digital smile makeover process, this scan can often happen chairside without a separate appointment.
At home, stick to the basics: gentle brushing with a fluoride toothpaste, and a desensitising toothpaste for a week or two if cold sensitivity lingers. NHS guidance on dental care recommends consistent brushing and flossing throughout and after orthodontic treatment, and that habit matters more than ever once your teeth are attachment-free and fully visible.
- Brush twice daily with fluoride toothpaste, focusing on where attachments used to sit
- Use a desensitising agent short-term if cold or air causes discomfort
- Wear retainers exactly as instructed, this is when relapse risk is highest
- Book a quick check-up if you notice rough patches, discolouration, or shadows where composite was removed
Pro Tip: Run your tongue over each tooth a day or two after removal. Any rough or “sticky” feeling usually means a spot of composite was missed, and it is a five-minute fix rather than something to live with.
How long it takes, what it costs, and how to book
A typical removal appointment runs a short duration, depending on how many attachments you have and whether retainer scans happen in the same visit. Straightforward cases with a handful of attachments sit at the shorter end; full-arch cases with retainer fitting take longer.
Cost depends on a few variables: whether you are being treated privately or via the NHS route, the clinician’s experience level, and whether any restorative work, such as touching up a chipped tooth, is needed alongside removal. If you originally started Invisalign privately, removal is usually included as the final stage of your treatment plan rather than billed separately.
A few practical steps make booking smoother:
- Bring your original treatment plan or ClinCheck summary if you have switched clinics
- Ask directly what the retainer plan looks like before the appointment, not after
- Book a little ahead of your expected finish date so retainer fabrication does not leave a gap
If you are unsure what your own removal and retainer costs might look like, it is worth checking pricing details before your final review appointment.
Why trust this guide
This guide is written by Dr Tashfeen Jamil, BDS, MFDS RCS Ed, AssocFCGDent, GDC 286427, a practising cosmetic dentist. TJ Smile Studio carries out attachment removal using digital scanning for retainer provision, paired with a carbide-then-polish protocol under magnification, the same approach the clinical evidence supports for enamel preservation.
Patients treated at the clinic move from attachment removal straight into retainer fitting in the same visit, using the same digital workflow behind the practice’s Invisalign treatment plans. Full patient outcomes and case examples are available to view directly through the clinic.
What most patients get wrong about the final appointment
Patients tend to treat attachment removal as an afterthought, the boring bit after the “real” treatment is done. That is backwards. The removal appointment is where enamel gets protected or compromised, and where relapse either gets prevented or invited in.
The instrument choice matters more than most patients realise. A single coarse bur without a proper polishing follow-up can leave a rougher surface than the attachment itself did, and residual composite left behind becomes a plaque trap within weeks. Magnification is not a luxury add-on either, it is the difference between a clinician seeing a speck of leftover resin and missing it entirely.
If I had one piece of advice, it would be this: do not let the retainer conversation happen as an afterthought at reception. Ask about it before you sit in the chair. The teeth you have worked months to straighten can begin moving within days of your last aligner, and a rushed or delayed retainer fit undoes far more good work than a slightly rough polish ever would.
— Dr Tashfeen Jamil BDS, MFDS RCS Ed, AssocFCGDent - GDC 286427
Ready to book your attachment removal appointment?
TJ Smile Studio gives Invisalign patients a clear route to their final appointment: attachment removal, enamel polishing, and retainer scanning handled in one visit rather than spread across separate bookings. That matters most in the days right after your last attachment comes off, when a delayed retainer fit is the single biggest risk to everything your treatment has achieved.
If you started Invisalign elsewhere or simply want a clinician who works under magnification with a proper carbide-then-polish protocol, TJ Smile Studio’s Invisalign service in Glasgow covers the full final stage, from removal through to your retainer fit. Get in touch to arrange your removal appointment and lock in your retainer timeline before your teeth get the chance to move.
This article is general information, not a substitute for advice from a qualified doctor. Consult a qualified healthcare professional about your own circumstances before acting on anything here.
Sources
- Clinical Practice systematic review on clear aligner attachment removal
- NHS — take care of your teeth and gums
- General Dental Council (GDC)
Recommended
This article is general information, not personal dental advice. What’s right for your teeth depends on a clinical examination — the condition of your enamel, gums, bite and any existing dental work — and no article can assess that. Outcomes vary between patients, and all treatment at TJ Smile Studio is subject to assessment and clinical suitability.
- Dr Tashfeen Jamil BDS, MFDS RCS Ed, AssocFCGDent, PGDip Restorative and Aesthetic Dentistry — GDC registration 286427
This article is general information, not personal dental advice. What's right for your teeth depends on a clinical examination — the condition of your enamel, gums, bite and any existing dental work — and no article can assess that. Outcomes vary between patients, and all treatment at TJ Smile Studio is subject to assessment and clinical suitability.
Clinically reviewed by Dr Tashfeen Jamil BDS, MFDS RCS Ed, AssocFCGDent, PGDip Restorative and Aesthetic Dentistry — GDC registration 286427, Principal Dentist at TJ Smile Studio, 1 Spiersbridge Way, Thornliebank, Glasgow G46 8NG.
If you have dental pain, swelling or an injury, call the practice on 07728 808510. Out of hours in Scotland, call NHS 24 on 111.